
As temperatures drop and winter approaches, it’s time to prepare your RV for the harsh conditions ahead. Proper winterization protects your investment from freezing temperatures and ensures you’ll be ready to hit the road when warmer weather returns. Here at Cheyenne Camping Center, we’re your trusted resource for RV maintenance and winterization products, and this guide will walk you through essential winterization procedures. Plus, by following our top 10 RV maintenance tips, you can take proactive steps to protect your RV and avoid costly repairs.
The Importance of RV Winterization
Freezing temperatures can wreak havoc on your RV’s plumbing system, from burst pipes to cracked fittings. Both exterior and interior components are vulnerable to damage from snow, ice, and moisture buildup if not properly prepared.
Preventing Damage From Cold Weather
Winterizing prevents the following risks:
- Burst pipes: When water freezes, it expands, leading to burst pipes in the RV’s plumbing system. According to RV experts, repairing burst pipes can cost hundreds or thousands of dollars depending on the extent of the damage and the location of the RV.
- Cracked tanks and fittings: Tanks and fittings holding water, such as the fresh water tank, gray and black water tanks, and water heater, are susceptible to cracking when exposed to freezing temperatures.
- Damaged exteriors: The RV’s exterior, including its siding, seals, and awnings, can deteriorate when exposed to freezing conditions.
- Damaged interiors: Moisture buildup inside the RV can lead to mold and mildew growth.
- Broken appliances: Appliances, such as refrigerators and air conditioners, can be damaged in freezing temperatures.
Ensuring a Smooth Start for Spring Travels
Here’s how winterizing can save you time and money:
- Preventing damage: By preventing issues such as burst pipes, cracked tanks, and appliance damage through winterization, you can avoid costly, time-consuming repairs.
- Ensuring readiness: In spring, you can focus on routine maintenance tasks, such as checking tire pressure, inspecting fluid levels, and cleaning, rather than addressing damage from winter.
- Preserving resale value: A well-maintained RV retains its resale and trade-in value.
Comprehensive Winterization Steps
Here’s a step-by-step RV winterization guide to protect it during the colder months.
Draining Water Systems and Adding Antifreeze
An essential step is to thoroughly drain the fresh water tank, gray and black water tanks, and water heater to prevent damage from ice expansion. Once they’re drained, follow the manufacturer’s instructions to add RV-specific antifreeze to the plumbing system.
Fresh Water Tank
Here’s how to drain the fresh water tank:
- Turn off the water pump.
- Locate the drain valve, typically found underneath the RV near the tank.
- If necessary, attach a hose to direct the water away from the RV.
- Open the valve and allow the tank to drain.
- Once drained, close the valve.
Gray and Black Water Tanks
Here’s how to drain the gray and black water tanks:
- Drive the RV to an appropriate dumping station.
- Start by emptying the black water tank, using its built-in flush system to clean.
- Dump the gray water tank, flushing out remaining waste and debris.
- Close both tank valves securely.
Water Heater
Here’s how to drain the water heater:
- Turn off the water heater and allow it to cool down.
- Open the drain valve to allow the water heater to drain completely.
- Once drained, close the valve.
Adding RV Antifreeze
Here are some tips for adding antifreeze:
- Choose RV-specific antifreeze.
- Set the bypass valve to avoid filling the water heater with antifreeze.
- Close the tank valve.
- Add antifreeze, typically one to two gallons depending on the size of your plumbing system.
- Turn on the RV’s water pump.
- One by one, open each faucet (both hot and cold), including showers and toilets.
- Flush toilets until antifreeze appears in the bowl.
- Turn off the water pump.
- Dispose of any excess antifreeze safely.
Protecting the Exterior and Interior
Protecting your RV’s exterior and interior during winter storage is equally important for maintaining its longevity and functionality. Here are some tips:
- Remove batteries, storing them in a warm, dry place.
- Use space heaters or heating pads to prevent freezing.
- Cover exterior components to protect them from snow and ice, and reseal any outside cracks.
- Clean the roof, vents, and seams, applying sealant or coating as needed.
- Remove perishable items.
- Clean the interior, using moisture absorbers to prevent mold and mildew.
- Insulate enclosed spaces and ensure proper air circulation to prevent condensation.
What You Need for RV Winterization
As autumn arrives and temperatures drop, you’ll need essential tools and supplies to winterize your vehicle.
Checklist of Tools and Supplies
Start your winter preparation by obtaining the following:
- RV-specific antifreeze.
- Tools, such as a socket wrench set.
- A hose for draining.
- Soft cloths or towels.
- RV covers.
- Pipe insulation.
- Electrical or duct tape.
- Cleaning supplies.
- Sealant.
- Battery maintenance supplies.
- An air compressor.
- A dehumidifier.
Where To Find Quality Winterization Products
Cheyenne Camping Center offers an extensive inventory of winterization essentials for every part of your RV. Online retailers, such as Amazon and Camping World, also offer a wide range of products. Additionally, local RV dealerships and stores can provide expert advice and may offer seasonal promotions.
Pro Tips for Effective Winterization
Being proactive is key to successful winterization.
Avoiding Common Mistakes
A common mistake is failing to drain water systems completely. Even small amounts of water can freeze, causing costly damage. Double check that you’ve drained all water lines, tanks, and fixtures, and make sure to add antifreeze.
Additional Maintenance Checks
Inspect and replace worn or damaged seals, gaskets, and weatherstripping to prevent water infiltration. Carefully examine the roof, vents, and seams, repairing or resealing as needed to maintain a watertight seal. Check your tire pressure and consult your RV owner’s manual for model-specific winterization steps and advice.
Get Ready for Winter With Cheyenne Camping Center
Here at Cheyenne Camping Center, RV maintenance is one of our specialties, and we understand the importance of protecting your mobile home. Contact us to explore our well-stocked store and discover a wide array of winter preparation essentials, including antifreeze, insulation, covers, and storage bins. Our skilled technicians can provide knowledgeable advice and comprehensive winterization services, ensuring your RV is ready for winter.
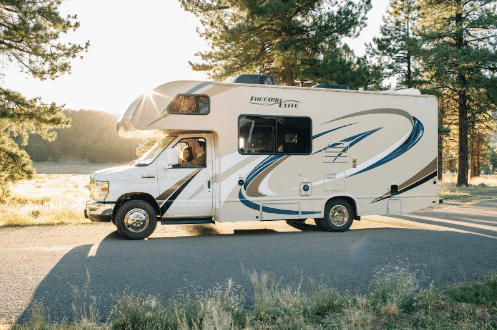
white and brown van on road during daytime byRoadpass is licensed withUnsplash License